


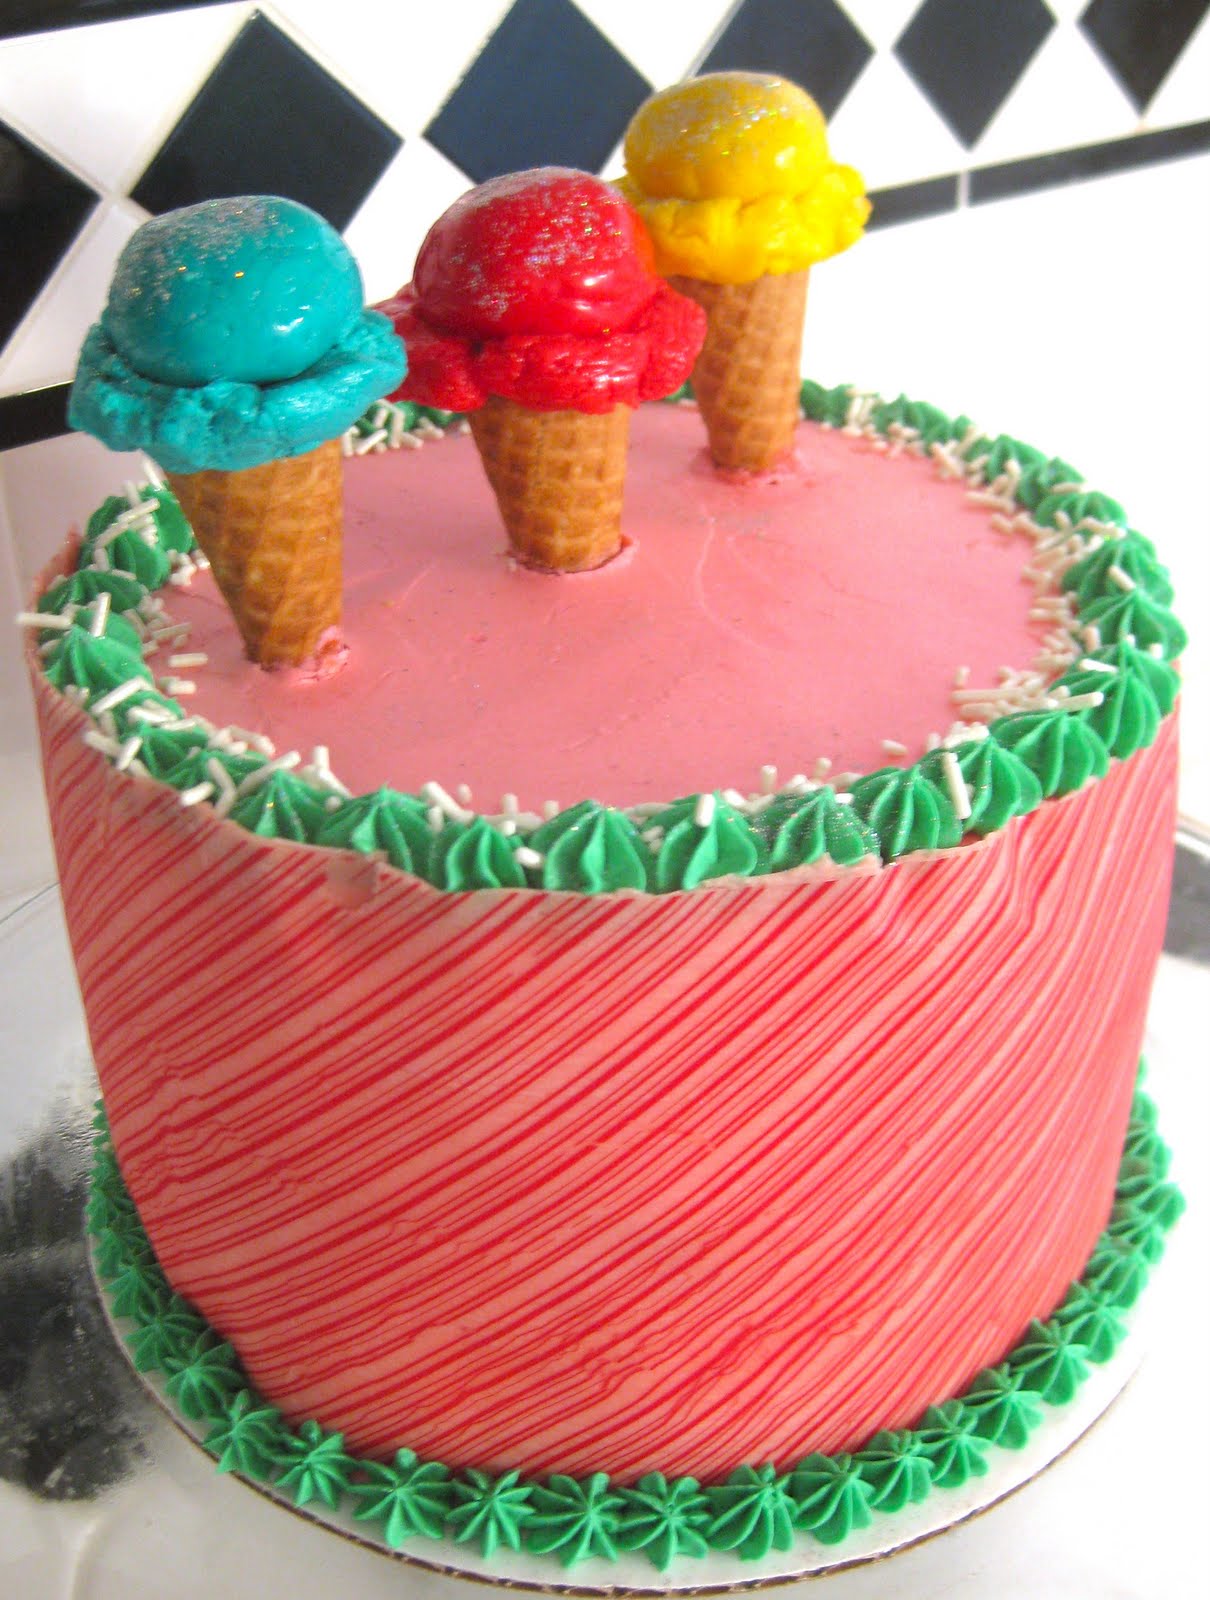
Since it's summer, I thought it would be fun to make an ice cream sundae inspired cake. Plus, I really wanted the excuse to use my new red striped chocolate transfer sheets.
The cake is made up of three 7" round layers. I made mine with 2 layers of vanilla bean cake and one layer of chocolate cake, but it's probably easiest to make one recipe and split it between three pans and baked all at one time. I only had to pans, so I had to make two separate cake recipes.
For the vanilla bean cake:
Ingredients
3 cups sifted cake flour
2 tsp baking soda
1/2 tsp salt
1 1/2 sticks unsalted butter
1 1/2 cups granulated sugar
1 tbsp vanilla bean paste or 1 vanilla bean, scraped
6 egg whites
1 cup sour cream
1/2 cup water
Sift together the pre-sifted cake flour, baking soda, and salt and set aside. Cream together butter and sugar. Add vanilla and then add in egg whites in 2-3 addition, mixing well. Combine water and sour cream in a separate bowl, whisking together. Add in dry ingredients and wet ingredients, alternating, in two batches. Do not over mix. Separate batter into 3 7" cake pans. Bake for 25 minutes at 350 degrees, or until cake springs back to the touch.

For the Swiss Meringue buttercream:
6 egg whites
1 1/4 cups sugar
4 1/2 sticks unsalted butter
1 tsp vanilla extract
1 package oreos
2 cups fresh strawberries
Create a double boiler and whisk egg whites and sugar continuously over the water bath until sugar is completely melted and mixture reaches 160 degrees on a candy thermometer. Put egg whites and sugar into bowl of stand mixer fitted with whisk attachment and whisk until mixture is thick and shiny and fully cooled. Add in butter piece by piece, mixing well after each addition. Add in vanilla and switch to paddle attachment. Mix for another 2 minutes.
Set aside 2 bowls of 1/2- 2/3 cup of the swiss meringue buttercream.
For the Cookies and Cream filling:
From a regular sized package of oreos, add 1 1/2-2 rows of cookies to a food processor and process until cookies are mostly all crumbs with a few larger pieces. Add 1 cup of oreos to swiss meringue buttercream, using offset spatula. Continue adding more little by little to taste, if desired.
For the Whipped Strawberry filling:
Slice about 12 strawberries in half and to food processor with about 1 tbsp strawberry or raspberry jam. Process using short, quick bursts, so as not to puree strawberries. Add strawberry mixture to swiss meringue buttercream using offset spatula. Set aside.
For the Waffle Cone Chocolate Ganache
Ingredients
3/4 cup semisweet or bittersweet chocolate chips
1 cup heavy cream
2 small waffle bowls (can be purchased at grocery store)
Heat cream in small saucepan over stove top until hot- sides should be bubbly, but mixture should not be boiling. Remove saucepan from heat and stir in chocolate until smooth. Crush up waffle bowls and add to mixture. Place in fridge to cool until thick, but still spreadable.

To assemble:
Cut top layer of cakes off with a sharp knife until each cake layer is flat and of equal size. Place bottom layer on cake circle. Spread cookies and cream frosting onto cake until smooth. Add next cake layer. Spread strawberry frosting onto cake until smooth. Spread ganache onto bottom of third cake layer until smooth. Place last layer on top of the cake.
Once assembled, place cake in fridge for 1-2 hours or in the freezer for 20-30 minutes. Set aside small amount of swiss meringue buttercream for the star border. Tint remaining swiss meringue buttercream to color of your choice. Frost entire cake using offset spatula. Keep in mind that the sides do not need to be frosted perfectly if you are applying a chocolate transfer.
Cut chocolate transfer sheet to appropriate width and height. You will need to tape together 2-3 pieces to fully cover the cake. Spread candy melting wafers or tempered chocolate onto the rough side (food coloring side) or the chocolate transfer in a thin, smooth layer, using an offset spatula. Allow chocolate to set for 5-7 minutes until set, but not fully hard. Apply chocolate transfer to cake with the wet side of the chocolate (non-shiny side) directly on the frosted cake.
Tape the chocolate transfer where the two edges of the sheet meet on the cake. Place cake in the fridge for about 30 minutes so chocolate can fully set. Once set, carefully peel off plastic side of chocolate transfer.
To decorate, I piped a simple star border on to the top and bottom layers of the cake. I made the ice cream cone toppers by cutting the tops of three sugar cones off with a seratted knife. The "ice cream" is made out of balls of fondant, which I placed on top of each cone and add a pressed layer of fondant to the edge of.
For very detailed instructions on how to apply a chocolate transfer to a cake, please see this tutorial. It's actually quite easy to do (it was my first attempt) and it creates such a pretty and special effect. I think it's my new favorite decorating technique.
Happy baking!

oh my word i wanna eat this!!!
ReplyDeleteBeautiful, absolutely beautiful!! SMB is my next thing to conquer you've inspired me!
ReplyDeleteThank you both!!!
ReplyDeleteAnd yes, go for it! :) The first time I made SMB was because I needed a filling for the first set of French Macarons I made and I was surprised by how easy it turned out to be.