Monday, February 28, 2011

Creme Brulee Cupcakes


Ever since I had my first cupcake at Enjoy Cupcakes in Santa Ynez Valley, I was enamored by their filled cupcakes and unique (and successful) flavors. The churro cupcake TASTES like a churro, the turtle cupcake TASTES like a chocolate caramel turtle, the wine infused cupcakes hold the clear nuance of chardonnay and cabernet sauvignon. And to top it off, they have a vintage trailer for special event catering...could it get much better?

Anyway, Enjoy Cupcakes has served as my inspiration to create unique flavors that are not only delicious, but actually taste like what they are supposed to. So often, a cupcake flavor does not live up to its name- not so with Enjoy Cupcakes! And not so with these Creme Brulee cupcakes, if I do say so myself.

I should start off by stating that a creme brulee cupcake recipe is not as unique as you might think. There are multiple recipes that add caramel to the batter and use a brown sugar swiss meringue buttercream, which is sprinkled with brown sugar and bruleed. I also found other cupcake recipes, which core a cupcake and fill it with actual creme brulee (which is torched like the traditional dessert). My goal with this cupcake was to incorporate both actual creme brulee AND frosting.

For the yellow cupcakes:
Ingredients:
2 1/2 cups sifted cake flour
1 tsp baking soda
1 tsp salt
2 cups granulated sugar
1 stick butter, unsalted at room temperature
1 tbsp vanilla extract
4 eggs
1 cup light sour cream
1/3 cup cold water

Directions
Sift together dry ingredients and set aside. Cream the butter and sugar together by whipping with paddle attachment of stand mixer. After mixing for about 3-5 minutes and butter and sugar mixture is light and fluffy, add vanilla extract. Add eggs one at a time, mixing after each addition. Add 1/3 of the dry ingredients and mix until incorporated. Add some of the sour cream and water. Alternate the wet and dry ingredients until well combined. Do not over mix, but make sure the dry ingredients are fully combined into the batter.


For the creme brulee (Recipe adapted from Alton Brown version, Food Network):
Yield: 4 ramekins of creme brulee- enough to fill 24 cupcakes

Ingredients
1 pint heavy cream
1 vanilla bean, split and scraped
1/3 cup vanilla sugar, plus 1/4 cup to sprinkle on top of creme brulee
3 large egg yolks
1 quart hot water

Directions
Preheat the oven to 325 degrees F.

Place the cream, vanilla bean and its pulp into a medium saucepan set over medium-high heat and bring to a boil. Remove from the heat, cover and allow to sit for 15 minutes. Remove the vanilla bean and reserve for another use.

In a medium bowl, whisk together 1/3 cup sugar and the egg yolks until well blended and it just starts to lighten in color. Add the cream a little at a time, stirring continually. Pour the liquid into 6 (7 to 8-ounce) ramekins. Place the ramekins into a large cake pan or roasting pan. Pour enough hot water into the pan to come halfway up the sides of the ramekins. Bake just until the creme brulee is set, but still trembling in the center, approximately 40 to 45 minutes. Remove the ramekins from the roasting pan and refrigerate for at least 2 hours and up to 3 days.


Cupcake Assembly
Once the cupcakes are completely cooled, use a sharp paring knife to cut out the center of each cupcake. When all of the cupcakes are cored, scoop the creme brulee out of the ramekins and into a pastry bag (no tip needed). Fill each cupcake hole up to the top. If you have enough creme brulee, feel free to allow it to overflow outside of the cupcake core a bit.

For the brown sugar swiss meringue buttercream:
Ingredients:
4 egg whites
3 sticks unsalted butter
1 cup light brown sugar
1 tbsp vanilla

Fill a saucepan about 1/3 way full with water and place on medium heat until simmering. Place brown sugar and egg whites in heat safe bowl. Place bowl inside pot of simmering water (not allowing the water to come into contact with the bowl's contents) and whisk egg whites and sugar until sugar has melted and a candy thermometer reads 160 degrees.

Place mixture into mixing bowl. Place whisk attachment on stand mixer and and beat on medium high until mixture has a thick and fluffy meringue-like consistency and is cooled. Add butter piece by piece, mixing well after each addition. Once butter has all been added, switch to a paddle attachment and beat for an additional 2 minutes.

Fit a pastry bag with a large star tip. Pipe frosting around the edge of each cupcake, leaving the creme brulee center uncovered.

After all of the cupcakes are frosted, sprinkle vanilla sugar on top of each creme brulee core and torch until caramelized.


Thursday, February 17, 2011

Scotchmallow Part Deux: Homemade Heart Candies


After making a scotchmallow inspired cupcake, it just seemed like the obvious next step to make the actual candies.

Like the See's version, these candies are made with a layer of homemade marshmallow, caramel, and then coated in dark chocolate. Also like the current (or belated, more accurately stated) holiday theme showcased in scotchmallow candies at See's stores, I made mine heart shaped.

The trickiest part about these is tempering the chocolate, which I did not completely succeed at. You'll need a chocolate thermometer (to measure temperatures lower than 100 degrees), not just a candy thermometer. "Tempering" chocolate means bringing it up to the right temperature, than back down to a lower temperature, so that the cocoa butter molecules structure correctly and the chocolate dries with a good "snap" and sheen.

However, if you buy good quality chocolate in bar form, you may be able to get away with not tempering at all since the bar is already tempered. You just cannot melt the chocolate at any higher temperature than 91 degrees (had I known this definitively prior to starting my candy making, I would have tried this first). See this article from Fine Cooking online for more details. If you don't want to mess with melting real chocolate at all, you can use a better quality melting chocolate too (such as Mercken's wafers).

There are also many steps involved: making the marshmallow, making the caramel, cutting both into shapes, stacking, and dipping. I would suggest making the mallow and the caramel one day and cutting/assembling/dipping the next day.

Making the marshmallow was simple, but I would highly suggest you watch this episode of Alton Brown's "Good Eats" on YouTube prior to starting- it's chock full of great tips for marshmallow making and it's also pretty darn funny.

Surprisingly, cutting the pan of marshmallow and caramel into heart shapes was pretty simple, but you will need to make sure that your caramel is soft enough.

For the homemade marshmallow:

Ingredients:

3 packages unflavored gelatin
(Tip: One box of Knox Gelatin contains 4 packets- you will only need 3)
1 cup ice cold water, divided
1 1/2 cups granulated sugar
1 cup light corn syrup
1/4 teaspoon kosher salt
1 tbsp vanilla extract
1/4 cup confectioners' sugar
1/4 cup cornstarch
Nonstick spray

Directions
Place the gelatin into the bowl of a stand mixer along with 1/2 cup of the water. Have the whisk attachment standing by.

In a small saucepan combine the remaining 1/2 cup water, granulated sugar, corn syrup and salt. Place over medium high heat, cover and allow to cook for 3 to 4 minutes. Uncover, clip a candy thermometer onto the side of the pan and continue to cook until the mixture reaches 240 degrees F, approximately 7 to 8 minutes. Once the mixture reaches this temperature, immediately remove from the heat.

Turn the mixer on low speed and, while running, slowly pour the sugar syrup down the side of the bowl into the gelatin mixture. Once you have added all of the syrup, increase the speed to high. Continue to whip until the mixture becomes very thick and is lukewarm, approximately 12 to 15 minutes. Add the vanilla during the last minute of whipping. While the mixture is whipping prepare the pan as follows:

Combine the confectioners' sugar and cornstarch in a small bowl. Lightly spray a 12 by 17-inch metal baking pan with nonstick cooking spray. Add the sugar and cornstarch mixture and move around to completely coat the bottom and sides of the pan. Return the remaining mixture to the bowl for later use.

When ready, pour the mixture into the prepared pan, using a lightly oiled spatula for spreading evenly into the pan. Dust the top with enough of the remaining sugar and cornstarch mixture to lightly cover. Allow the marshmallows to sit uncovered for at least 4 hours.


Cutting out the mallow hearts!


For the caramel:

I used the trusty caramel recipe featured on Giver's Log once again, however, note that you'll need to make 1 1/2 the recipe to make enough caramel. Also, I noticed that making a larger batch helped my temperature and consistency to be more accurate, as I think the other times I've made caramel, the thermometer may have touched the bottom of the pan due to their not being enough volume to take up space. Once my caramel reached 240 degrees (soft ball stage), I took it off of the heat and poured into another 12x17 baking sheet. Again, you'll need to test out your thermometer to see what temperature is the magic number for you.

Make sure you line the baking sheet with PLENTY of parchment paper. Otherwise, your hearts will be very difficult to get out without entirely squishing them.

Equipment needed:
candy thermometer
heavy, 4-qt sauce pan
parchment paper to line pan
12x17 baking sheet

Ingredients: (adjusted to make 1.5x the original recipe)
3 sticks unsalted butter
1 1/2 cups light corn syrup
1 14-oz. can sweetened condensed milk and 1/2 cup half-and-half
3 1/2 cup brown sugar (14.5 oz.)
1 tbsp. vanilla

For cooking method, please see above Giver's Log.

To assemble the heart scotchmallows: (yields 50-60 heart candies)

Once you have made both the marshmallow and caramel and they have cooled for several hours, or overnight, use small-medium sized heart cookie cutter to cut shapes from the pan. Cut the marshmallows first and try to cut as close together as possible so as to create as many hearts as possible.

HINT: Don't worry if the top of your marshmallow is somewhat bumpy- it's very difficult to get the pan of mallow perfectly smooth since it solidifies so quickly and is so very sticky. The bumps on the top of the marshmallows will not matter in the end because the caramel hearts will be stacked on top of them.

After your marshmallows are cut, prepare the chocolate for dipping and dip the one of the sides of the hearts in chocolate (this will make it easier to dip the sides and tops later after the caramel layer is added).

While the chocolate is hardening, cut the pan of caramel with the heart cookie cutter.
After the whole pan is cut and the chocolate on the marshmallows has hardened, flip the marshmallow heart so that the undipped layer faces up. Add a layer of caramel on top of the non-dipped side. Stack all of the candies first (the marshmallow and caramel layers will naturally form together enough to dip them since they're each so sticky).

After all of the hearts are stacks, dip the top and sides of the hearts in chocolate, shaking off and smoothing away excess chocolate, if necessary.

Allow to cool and harden on parchment paper.

Enjoy all of them for yourself and/or gift to loved ones and friends. These candies will keep for about 3 weeks.


Tuesday, February 15, 2011

Port Wine Infused Chocolate Cupcakes with Chocolate Mousse Frosting


These cupcakes are what I would classify as an "easy, fancy" recipe. The chocolate cupcake base is the same as used for the Scotchmallow Cupcakes.

Aside from what you'll need for the cake, the great thing about this recipe is the cupcakes look and taste very gourmet, yet are incredibly simple and require very few special ingredients to make. I made mine as mini-cupcakes because it worked out very well for me to use leftover cupcake batter from Valentine's Day cupcakes to fill my 12 cup mini-muffin pan from Sur La Table (I was dying to use that thing, but I need at least 2 more pans for one recipe amount of cupcakes to not take painfully long to make).

Since I wanted to make a mousse thick enough to be frosting, I was happy with this simple one from Jaques Torres, featured on Food Network.

For the Port Wine Reduction:

-2 Cups port wine (I used a Portuguese port from Trader Joe's, a recommendation from Mr. Pixie Crust- he had a Portuguese roommate in college he drank it with, so he's sentimental about it)

OPTIONAL: You can add in lemon and/or orange zest to the port prior to reducing, but I simply reduced the port on its own.

Directions:
Gently boil the port until it reduces to about 1/2 cup- it should be a very thick, syrupy consistency.

Use 1/2 of the port reduction to brush onto each cupcake top with a pastry brush (you can gently apply with the back of a spoon as well).

For the Chocolate Mousse:

-14oz good chocolate (I did NOT use bittersweet chocolate. Rather, I used an equal mix of dark and milk Belgium chocolate and a bit of unsweetened baking chocolate wafers, all of which can be at Trader Joe's stores).
-1 pint heavy whipping cream

Directions:

Melt the chocolate over the stove by placing it in a heat safe bowl, placed inside a pot of simmering water. DO NOT let the water leak into the bowl containing the chocolate. You can also microwave the chocolate to melt, if easier.

Pour the entire pint of whipping cream into the bowl of an electric mixer. Put the whisk attachment on the mixer and whip on medium-high until mixture becomes very thick.

After the chocolate has cooled for a couple of minutes, gently fold in a bit at a time with a rubber spatula. Lastly, add the remaining port wine reduction to the mousse and gently fold in.

Transfer mousse to a pastry bag fitted with a large star tip. Pipe onto each cupcake. Garnish with a single blackberry, or as desired.

Friday, February 11, 2011

Mini Heart Layer Cakes for Valentine's Day


Valentine's Day is my absolute favorite commercial holiday.

Hmm, I don't know if that came out right...
The truth of the matter is, I think Valentine's Day often gets a bad rap by embittered single people who take the romantic element too seriously and by quasi-liberals who consistently throw around the tired rhetoric of "hating the commercialism" of it.

What happened to an appreciation of the elementary school version of Valentine's Day? I suppose I've always carried with me the original meaning I interpreted the day to be about as a kid- cartoon Valentine's cards exchanged in class and placed in homemade mail boxes, glittery heart covered merchandise, and candy galore.


Now that I have an amazing husband, I really enjoy the grown-up romantic element as well (of course), but the childlike version of Valentine's Day will always hold a special place with me.

For this Valentine's Day, I'll have a three-series post (hello, favorite commercial holiday- I take holiday dessert making very seriously). The featured recipe today is Mini Berry Flavored Heart Layer Cakes.

Think strawberry cake mix cakes with strawberry canned frosting, but grown up and with a more gourmet twist. These mini-cakes have a mixed berry flavor and are covered in a raspberry swiss meringue buttercream. Each individual cake is sandwiched together with cream cheese strawberry frosting for an extra element of flavor.

I won't lie- these were a bit of a pain in the butt to make, but they turned out adorable and were a huge hit with my professional tasters (AKA-wonderfully encouraging co-workers). Part of the cuteness of the cakes is the vibrancy of the pink, almost fuchsia color of the cake AND the frosting. To achieve the perfect shade, I used (and highly recommend) AmeriColor food coloring in "Deep Pink."

I wasn't sure what I was going to make as my first Valentine's Day dessert, but I quickly devised a recipe, once my Brother-in-Law offered to take photos of my creations. He is extremely talented and I was both in awe and ecstatic about how amazing the pictures turned out.


For the Berry Flavored Heart Cakes:

2 1/2 cups cake flour
1 1/2 cups sugar
2 sticks butter
1 cup sour cream
2/3 cup mixed berry puree (boil until reaches 2/3 cup)
1 oz Raspberry extract
1 tsp baking powder
1 teaspoon salt
1 tablespoon vanilla
2 eggs
3 egg whites

Preheat oven to 350 degrees (always set mine to 330 because my oven is vintage and HOT). Butter and flour three 9-by-2-inch cake pan, tapping out excess flour. In a medium bowl, whisk flour, baking powder, baking soda, and salt.

In a large bowl, using an electric mixer, beat butter and sugar until light and fluffy. With mixer on low, beat in egg and whites, one at a time. Beat in vanilla and raspberry extract. Alternately beat in flour mixture and sour cream until well combined. Lastly, fold in puree.

Pour batter into pans and smooth tops. Bake until cake springs back to the touch and a toothpick inserted in center comes out clean (about 25 minutes).

For the Berry Puree:
1/2 cup fresh blackberries
1 1/2 cup fresh strawberries (you can use raspberries, as well, but I used what I had on hand)
1/4 cup sugar

Combine berries and sugar into blender and use puree setting until completely smooth. Put mixture through a mesh sieve to remove seeds. Heat mixture on low and boil until reduced.

For the Strawberry Cream Cheese Frosting, see Neapolitan Cake Recipe.

For the Raspberry Swiss Meringue Buttercream:
Marshmallow Italian Meringue Frosting
Ingredients: (Italian meringue base courtesy of Martha Stewart Online)
4 egg whites
1 cup sugar
3 sticks butter
1 tsp vanilla
1 oz Raspberry Extract
1/4 cup berry puree

Cook egg whites sugar in metal bowl placed inside (not touching) a pot of boiling water. Continually whisk mixture over heat until it reaches 180 degrees. Pour hot egg mixture into mixing bowl fitted with whisk attachment. Whisk until soft peaks form. Once egg whites are cool, add butter a piece at a time, whisking well after each addition. Once well combined, switch to paddle attachment and mix for 2 minutes.

Add vanilla and raspberry extracts, food coloring, and berry puree. Mix for another 1-2 minutes.


To Assemble the Mini-Heart Cakes: (makes 12-14 double layer mini cakes)

Once baked, put each cake in the fridge to ease the construction stage of the mini-cakes (colder cakes means=fewer crumbs). Cut each cake with a small-medium sized heart shaped cookie cutter (I bought mine from the 99 cent store, believe it or not). Since the cakes are fairly dense, it was actually even easier than I expected to cut through it with the cookie cutter. The hearts turned out perfectly shaped and with very clean edges.

The scrap cake pieces leftover for YOU to eat!


Stack two hearts on top of each other, "gluing" together with strawberry cream cheese frosting (you can also add an additional layer of swiss buttercream to achieve greater height in the little cakes), and using the flatter side as the "top" of the cake (it will be easier to frost this way).


Once all of the little cakes are assembled, you may want to put them in the fridge again for an hour or so if they've warmed up a bit. If not, you can frost them as it with the raspberry buttercream, using a small flat spatula (I used a butter knife, which work pretty well too).


Once the cakes are frosted, sprinkle the tops with sprinkles of your choice.


TIP: When preparing for transport (if you will be taking the cakes somewhere) refrigerate them prior, if you have the chance. Otherwise, the frosting will still be soft and any sort of plastic wrap, foil, etc. will squish the frosting.

Sunday, February 6, 2011

Mango Coconut Cupcakes for Chinese New Year

Happy Chinese New Year!


I deliberated over what flavors to use in a Chinese New Year dessert. I thought about almond cookies (which are still to come in a future post), green tea cake, sesame seed cupcakes, and many others, but after doing much research, I eventually decided on a fruity combination- coconut mango.

The cupcakes are a simple recipe for a white cake with coconut extract. After they're baked and cooled, a homemade mango nectar syrup is brushed on top for moisture and flavor. Finally, they're topped with a Mango puree French buttercream. The frosting was partially influenced by the frosting Bobby Flay created for his "Throwdown" recipe: Gingerbread Cupcakes with Caramelized Mango Buttercream. I used both fresh and frozen mangos from Whole Foods in the frosting. Mr. Pixie Crust, being as sweet and equipped in the kitchen as he is, cut up both of the fresh mangos for me. I caramelized the two fresh mangos with 2 tablespoons of butter, some brown sugar, and mango nectar syrup. I then used frozen mangos (NOT caramelized) for the remainder of the frosting. You certainly could leave all of the mango fresh, or caramelize all of it, but I did a combination to create a richer, more complex fruit flavor.

The frosting tastes like biting into a buttery, fluffy mango cloud. It turned out pretty delicious. I was nervous that the flavor might not be intense enough when I decided to make the buttercream, but it definitely was. In fact, since the original Bobby Flay recipe did not include any sort of guidelines of the amount of mango puree you should end up with and add to the buttercream, mine turned out kinda runny and never became the consistency I had intended. By using less puree the second time around, the flavor was still there, but the prettiness of thicker, piped frosting was also attained.

For the Coconut Cupcakes (Yields 24 cupcakes):

• 2 sticks unsalted butter, room temperature, plus more for pans
• 3 cups sifted cake flour
• 1 cup sour cream
• 6 large egg whites
• 1 tablespoon pure coconut extract
• 2 tsps baking soda
• 1 1/2 cups sugar
• 1/2 cup water


Preheat oven to 350 degrees. Line 2 cupcake pans and spray with non-stick cooking spray.

In a medium bowl, stir together, sour cream, egg whites, water and extracts. Into a second medium bowl, sift together the flour, baking powder, and salt; set aside.

In the bowl of an electric mixer fitted with the paddle attachment, beat the butter on medium speed for 30 seconds. With machine running, gradually add the sugar. Continue beating until light and fluffy, about 5 minutes. Scrape down sides of bowl as necessary.

Add one-third of the flour mixture and one-third of the sour cream mixture, and beat on low speed until just incorporated. Add remaining mixtures in 2 separate batches beating between additions to fully incorporate. Scrape down sides of bowl, and stir by hand to finish.

Divide batter evenly between prepared pans. Bake until tops of cupcakes spring back when lightly pressed and a cake tester inserted in the center comes out clean, 25 to 30 minutes.

For the mango simple syrup:
• 1 cup mango nectar
• 1 cup sugar

Mix one cup of mango nectar one cup of water and heat over stovetop until gently boiling. Continue to heat until mixture thickens.

Once the cupcakes have completely cooled, use a pastry brush to lightly brush the top of each cupcake with the syrup (you can also use the back of a spoon, as long as you're gentle).

For the Mango Puree:(NOTE: You many want to make this 1-2 days in advance to cut out baking time on the day of)
• 2 fresh mangos, sliced
• 2 cups frozen mango chunks
• 2 tbsp honey
• 2 tbsp unsalted butter
• 2 tbsp mango syrup

Slice 2 fresh mangos into large pieces. Put mango slices into large sauce pan, drizzle 2 tbsp honey, 2 tbsp butter, and 2 tbsp mango syrup on top of mango. Cook mango until caramelized.

Put caramelized mango and fresh/frozen mango (2 cups) into blender and run blender on puree setting. Puree until totally smooth. Pour mixture through medium mesh strainer and set aside.

For the French Buttercream (Adapted from Bobby Flay's Caramelized Mango Buttercream recipe from Foodnetwork.com):
• 1 cup sugar
• 2 cups unsalted butter
• 6 egg yolks
• 1/2 cup light corn syrup
• remaining mango syrup
• 2/3 cup mango puree

In the bowl of a stand mixer fitted with a wire whip attachment, beat the egg yolks at medium-high speed until creamy and pale yellow, about 5 minutes.

In a non-stick saucepan, combine the sugar, corn syrup, and remaining mango simple syrup. Place over medium-high heat and bring to a full rolling boil without stirring and cook until it reaches soft-ball stage (238 to 242 degrees F) on a candy thermometer. Immediately pour the mixture into a buttered measuring cup to halt the cooking.

Add a small amount of the syrup to the beaten egg yolks, turn on the mixer to high speed, and beat for about 5 seconds. Continue stopping the mixer, adding syrup, and beating in the same manner until all of the syrup is incorporated and the mixture is cooled completely.

Add the butter, 1 piece at a time, and beat until incorporated before adding the next piece. When all of the butter has been blended in, add the vanilla and slowly add the mango puree (pay careful attention to the consistency of the buttercream and add more or less puree to your liking). Continue beating until combined.


For the Cupcake Assembly:

Once cupcakes have cooled and been brushed with mango syrup, place the mango buttercream into a pastry bag fitted with large star tip. Pipe buttercream evenly onto each cupcake.

After the cupcakes are frosted, begin creating sugar "fireworks." Place two fireworks on each cupcake. See the awesome tutorial here at the Wisdom of the Moon blog.

DISCLAIMER: In my first attempt at making hard candy/attempting sugar work, I definitely overcooked my sugar and did not have the same results as Wendy from Wisdom of the Moon.

One tip I would suggest is to make sure that you either double the recipe or using a smaller saucepan than I did (mine was a 3qt) and do not let your candy thermometer touch the bottom of the pan. Either way, I ended up with a sugar mixture that still looked beautiful on top of each cupcake. I simply swirled the mixture onto wax paper and then broke pieces apart (mine did not drizzle well since the sugar was overcooked- yay, improvisation!)

Also, Mr. Pixie Crust created a Mango Nectar Sake Martini that was amazing! Who doesn't love a dessert/cocktail pairing?

Sunday, January 30, 2011

Inspiration from See's Candy: Scotchmallow cupcakes


Walking into a See's Candy store never fails to make me sentimental. My parents would always include one of those kids Holiday boxes in our Christmas stockings and anytime we went to our local shopping mall, the big treat was to go on the carousel and pick out 6 sugar sticks or a sucker from See's. My two favorite chocolates from See's have been and will forever be: the Mocha (probably an early warning sign of my impending addiction to coffee) and the Scotchmallow.

A Mocha inspired cupcake promises to be a future adventure on Pixie Crust, but today, I'll share the Scotchmallow inspired cupcake I created. This cupcake has a good balance of having the flavors of a Scotchmallow candy, without being overly sweet. I will recommend, however, that you make sure you fill each cupcake with enough caramel and include enough marshmallow fluff to taste marshmallow-y enough (excuse the technical language ;) ). The actual chocolate cake recipe is AWESOME. Funny enough, I had yet to have discovered the perfect chocolate cake recipe: one that is light and fluffy, but also moist and rich enough. I actually stumbled upon this fantastic recipe on the back of the Swans Down cake flour box. I altered it slightly, but the base recipe is truly close to perfectly formulated, in my opinion.

If you decide to make these cupcakes, one tip I would offer is to make the caramel sauce the night before to cut out one less thing to do the day you bake, assemble, and frost the cupcakes.


Chocolate Cake Recipe
Yields 24 cupcakes

Ingredients:

2 1/4 cups sifted cake flour (I used Swans Down)
2 tsp baking soda
1 1/4 cup granulated white sugar
1 cup brown sugar
1 stick butter, at room temperature
1 tbsp vanilla extract
3 large eggs
1 cup sour cream
4 oz unsweetened baking chocolate
1 cup boiling water

Sift the flour and set aside. Whip the butter in an electric mixer fitted with paddle attachment until creamy. Add the granulated sugar to the butter and mix until creamed. Add the brown sugar and continue to mix on medium/high for an additional 2 minutes.

Add the eggs and vanilla extract and mix until well combined. Add the melted baking chocolate. Mix in the baking soda last.

Add the flour in batches, alternating with adding sour cream. Mix on medium until well combined- do not over mix!

Lastly, remove the bowl from the mixer stand. Add in the boiling water and hand stir until combined.

Bake for 25-35 minutes, until cake springs back to the touch and/or an inserted toothpick comes out clean.

Homemade Caramel Sauce (caramel recipe courtesy of Giver's Log)
Tools/Equipment:

3-4 quart saucepan
candy thermometer

Ingredients:
1 cup unsalted butter (2 sticks)
2 1/4 cups brown sugar
1 cup light corn syrup
1 14-oz can sweetened condensed milk
1 tsp vanilla extract

Cut butter into evenly sized cubes and melt over low heat in large 3-4 quart saucepan.
Once butter is fully melted, add brown sugar, being careful to avoid the sides of the pan. If any stray sugar crystals fall onto side of pan, carefully brush off with a wet pastry brush.
Once butter and sugar are fully combined, add corn syrup and condensed milk. Clip on candy thermometer to side of pan.
Cook mixture on low heat (still continually stirring) for about a minute or two. Increase heat to medium and continue to cook/ stir until mixture reaches 225 degrees. Once the mixture is removed from heat, stir in vanilla extract.

NOTE: Giver's Log gave 230 as the temperature to remove caramel from heat for it to form a sauce consistency, however, my sauce was still too hard when cooked to 228 (my oven and stove get crazy hot {so hot, my oven melted my adorable Anthro kitchen timer}, so I'd chock it up to different appliances and varying candy thermometers). If your sauce turns out too hard (once it's completely cooled and consistency is determined) gently reheat the caramel and add a couple table spoons of cream and water, stirring until fully combined. The mixture should be slightly more runny than desired when warm because it will continue to thicken once it's fully cooled.

Marshmallow Swiss Meringue Frosting
Ingredients:
(Swiss meringue base courtesy of Martha Stewart Online)
4 egg whites
1 cup sugar
3 sticks butter
1 tsp vanilla
2 jars marshmallow cream

Cook egg whites sugar in metal bowl placed inside (not touching) a pot of boiling water. Continually whisk mixture over heat until it reaches 180 degrees. Pour hot egg mixture into mixing bowl fitted with whisk attachment. Whisk until soft peaks form, then add butter in a piece at a time, whisking well after each addition. Once well combined, switch to paddle attachment and mix for 2 minutes.

Add vanilla and marshmallow cream (add as much as desired to taste- I added 1 whole jar) and mix for another minute or two.

Cupcake assembly instructions:
Once cupcakes have fully cooled (you may even want to put them in the fridge for 1/2 hour or so to make the cutting easier), use small paring knife to create a 3/4 inch circular hole in each cupcake. Do not cut all the way through the bottom of the cake.
Using a pastry bag and medium round tip, fill each hole with the caramel mixture and replace cake in hole. (you could skip this part if easier, since no one will see the caramel hole once the cupcakes are frosted).

After the cupcakes are all filled, use a pastry bag fitted with a large star attachment to pipe on frosting.
Decorate as desired. I chose to use some adorable pearl sprinkles I recently bought from Bake it Pretty, but if I had more time, I would have piped more caramel mixture onto the frosting, as well as some chocolate ganache or chips!


Monday, January 24, 2011

Sangria Tarts


While I am a wine lover and, I daresay, a burgeoning connoisseur, there aren't many cocktails that tempt me anymore. One drink that I continue to develop a deeper love for each day, however, is sangria. What I love about this mixed drink is that there are really no rules to it. There are so many different ways and wines that can go into making this drink: choice of fruit; white, red, dry or sweet wine; type of additional hard alcohol used; type of juice (if any) mixed in, added sugar or fizz, etc.

Some restaurants and bars (I've had especially good luck at a couple of Spanish restaurants and Tapas bars in the LA area) nail it. While others have disappointed me with syrupy sweet, barely recognizable sangria. My usual recipe (first showed to me by my good friend Jessica) includes a good dry red wine (I usually use a Syrah or Cabernet), Triple Sec, oranges, berries, apples, orange juice or pomegranate juice, and a sparkling element (sometimes a sparkling JUICE, which takes care of the last two ingredients in one swoop).


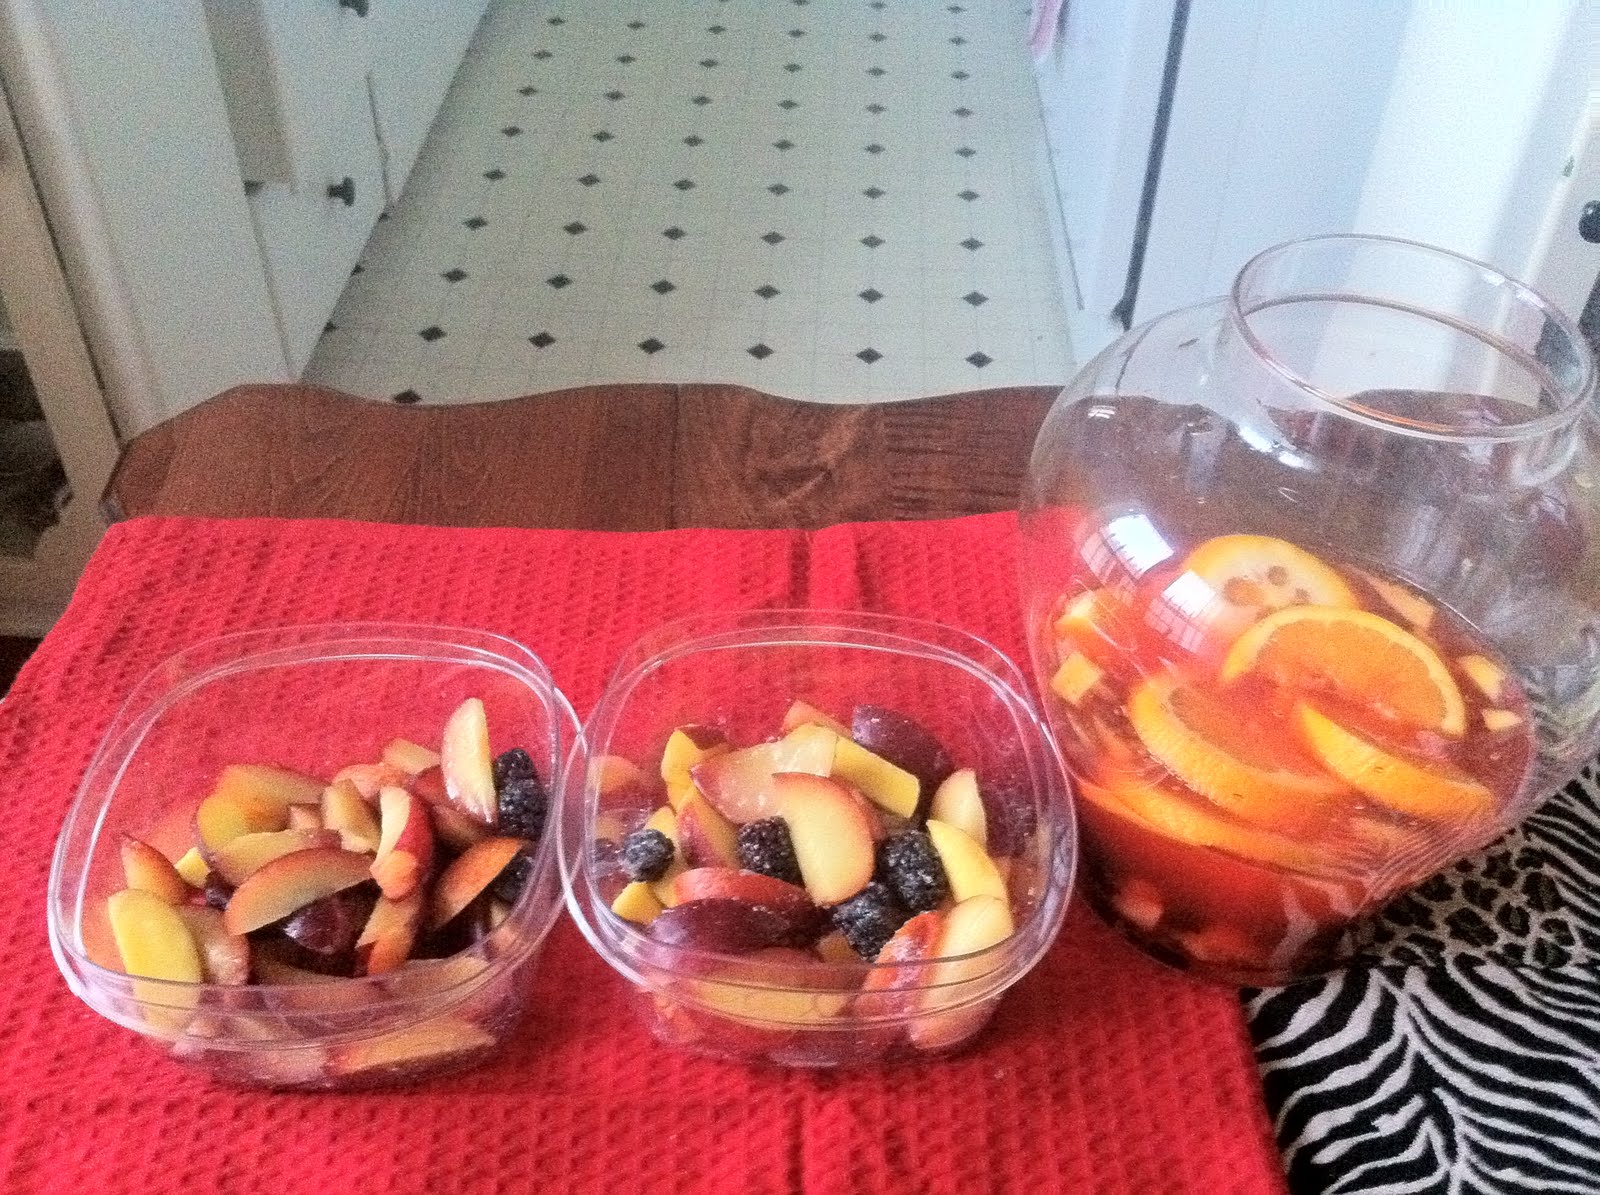
I decided I wanted to make a tart that is infused with the flavors of sangria. And what better way to do this than start by mixing up an actual pitcher of it?

Because this drink IS so loose with its rules, the batch I created in conjunction with my tart was made with white wine and non-traditional hard alcohol. The white sangria turned out great, but I would still like to try making these tarts with a red wine based sangria.

My White Sangria recipe:


Liquid Components:
(1) bottle dry red wine (I used a bottle of Sauvignon Blanc)
4 oz Limoncello (leftover from our Italy honeymoon)
3 oz Vermouth (hence the non-traditional component)
Fresh squeezed juice from 1 large navel orange (strained of seeds/pulp)
2 oz grenadine syrup

Fruit Components:
(1) Large navel orange sliced in rings
(2) Nectarines, pitted and sliced into wedges
(2) Plums, pitted and sliced into wedges
(1) cup fresh blackberries

Beginning with the oranges, slice the fruit. Slice one of the oranges and set aside. Slice the other orange in half and squeeze into a separate container until all of the juice is extracted. Strain and then put into the glass pitcher. Slice the plums and nectarines, and along with the blackberries, place into the pitcher. Pour the vermouth and limoncello into the pitcher, followed by the whole bottle of wine. Stir very well and then put mixture in the fridge to chill and absorb the flavors of the fruit for AT LEAST two hours.


Tart Recipe:

Shortbread Cookie Crust:

(4) cups all purpose flour
(4) Sticks cold butter, cubed
(1 1/3) cup confectioner's sugar

Filling:
(3) nectarines, pitted and sliced
(4) plums, pitted and sliced
1/3 cup, plus 2 tbsp granulated sugar
2 tablespoons butter
2 tablespoons cornstarch
about 1/2 cup reduced sangria

Sift together confectioner's sugar and flour by hand or in food processor. In an electric mixer (or food processor) fitted with a paddle attachment, combine sugar and flour with cubed butter, adding butter slowly. Once mixture begins clumping up, stop mixer. Using 6 mini tart pans with removable bottoms (or one large tart pan with removable bottom), separate dough into each one and press down so it is distributed evenly on the bottoms and sides. Once dough is in tart pans, put the pans in the fridge for at least 30 minutes.

Cut up the remaining 3 nectarines and 4 plums into small-medium sized wedges. Combine with blackberries into large mixing bowl. Add 1/3 cup granulated sugar to the bowl and mix well.

After Sangria has been chilled for 2 hours, remove from fridge and take out 1 cup (8 oz) from the pitcher and add to the fruit and sugar mixture. Allow fruit to steep in mixture for an additional 1 1/2 hours, stirring fruit every so often.

Once fruit has steeped in sangria mixture for the appropriate amount of time, strain fruit and pour liquid into a small saucepan. Gently boil until mixture reduces to about 1/2 or 1/3 cup. In the meantime, combine 2 tablespoons cornstarch with 2 tablespoons sugar in small bowl.

Once sangria is reduced to about 1/2 cup, pour back onto fruit and add in cornstarch/sugar mixture and 1 tsp vanilla extract. Stir well.

Remove tart pan/s from refrigerator. Scoop fruit mixture and a couple spoonfuls of liquid into each tart shell so that each type of fruit is about equal and so that the fruit is fairly level in the tart (not too overflowing or poking out high from crust). Add a few crumbs of cold butter, evenly spaced to the top of each tart. Use additional crust dough to cut even sized strips for the lattice topped tarts.

NOTE: It's less time consuming and just as tasty to do a "cobbler" like topping instead. If you choose to go this route, only make half of the crust recipe listed above.

Serve tarts plain or with whipped cream or ice cream. Pair with a tall glass of white sangria.